How to Setup GUI on a Cloud VM
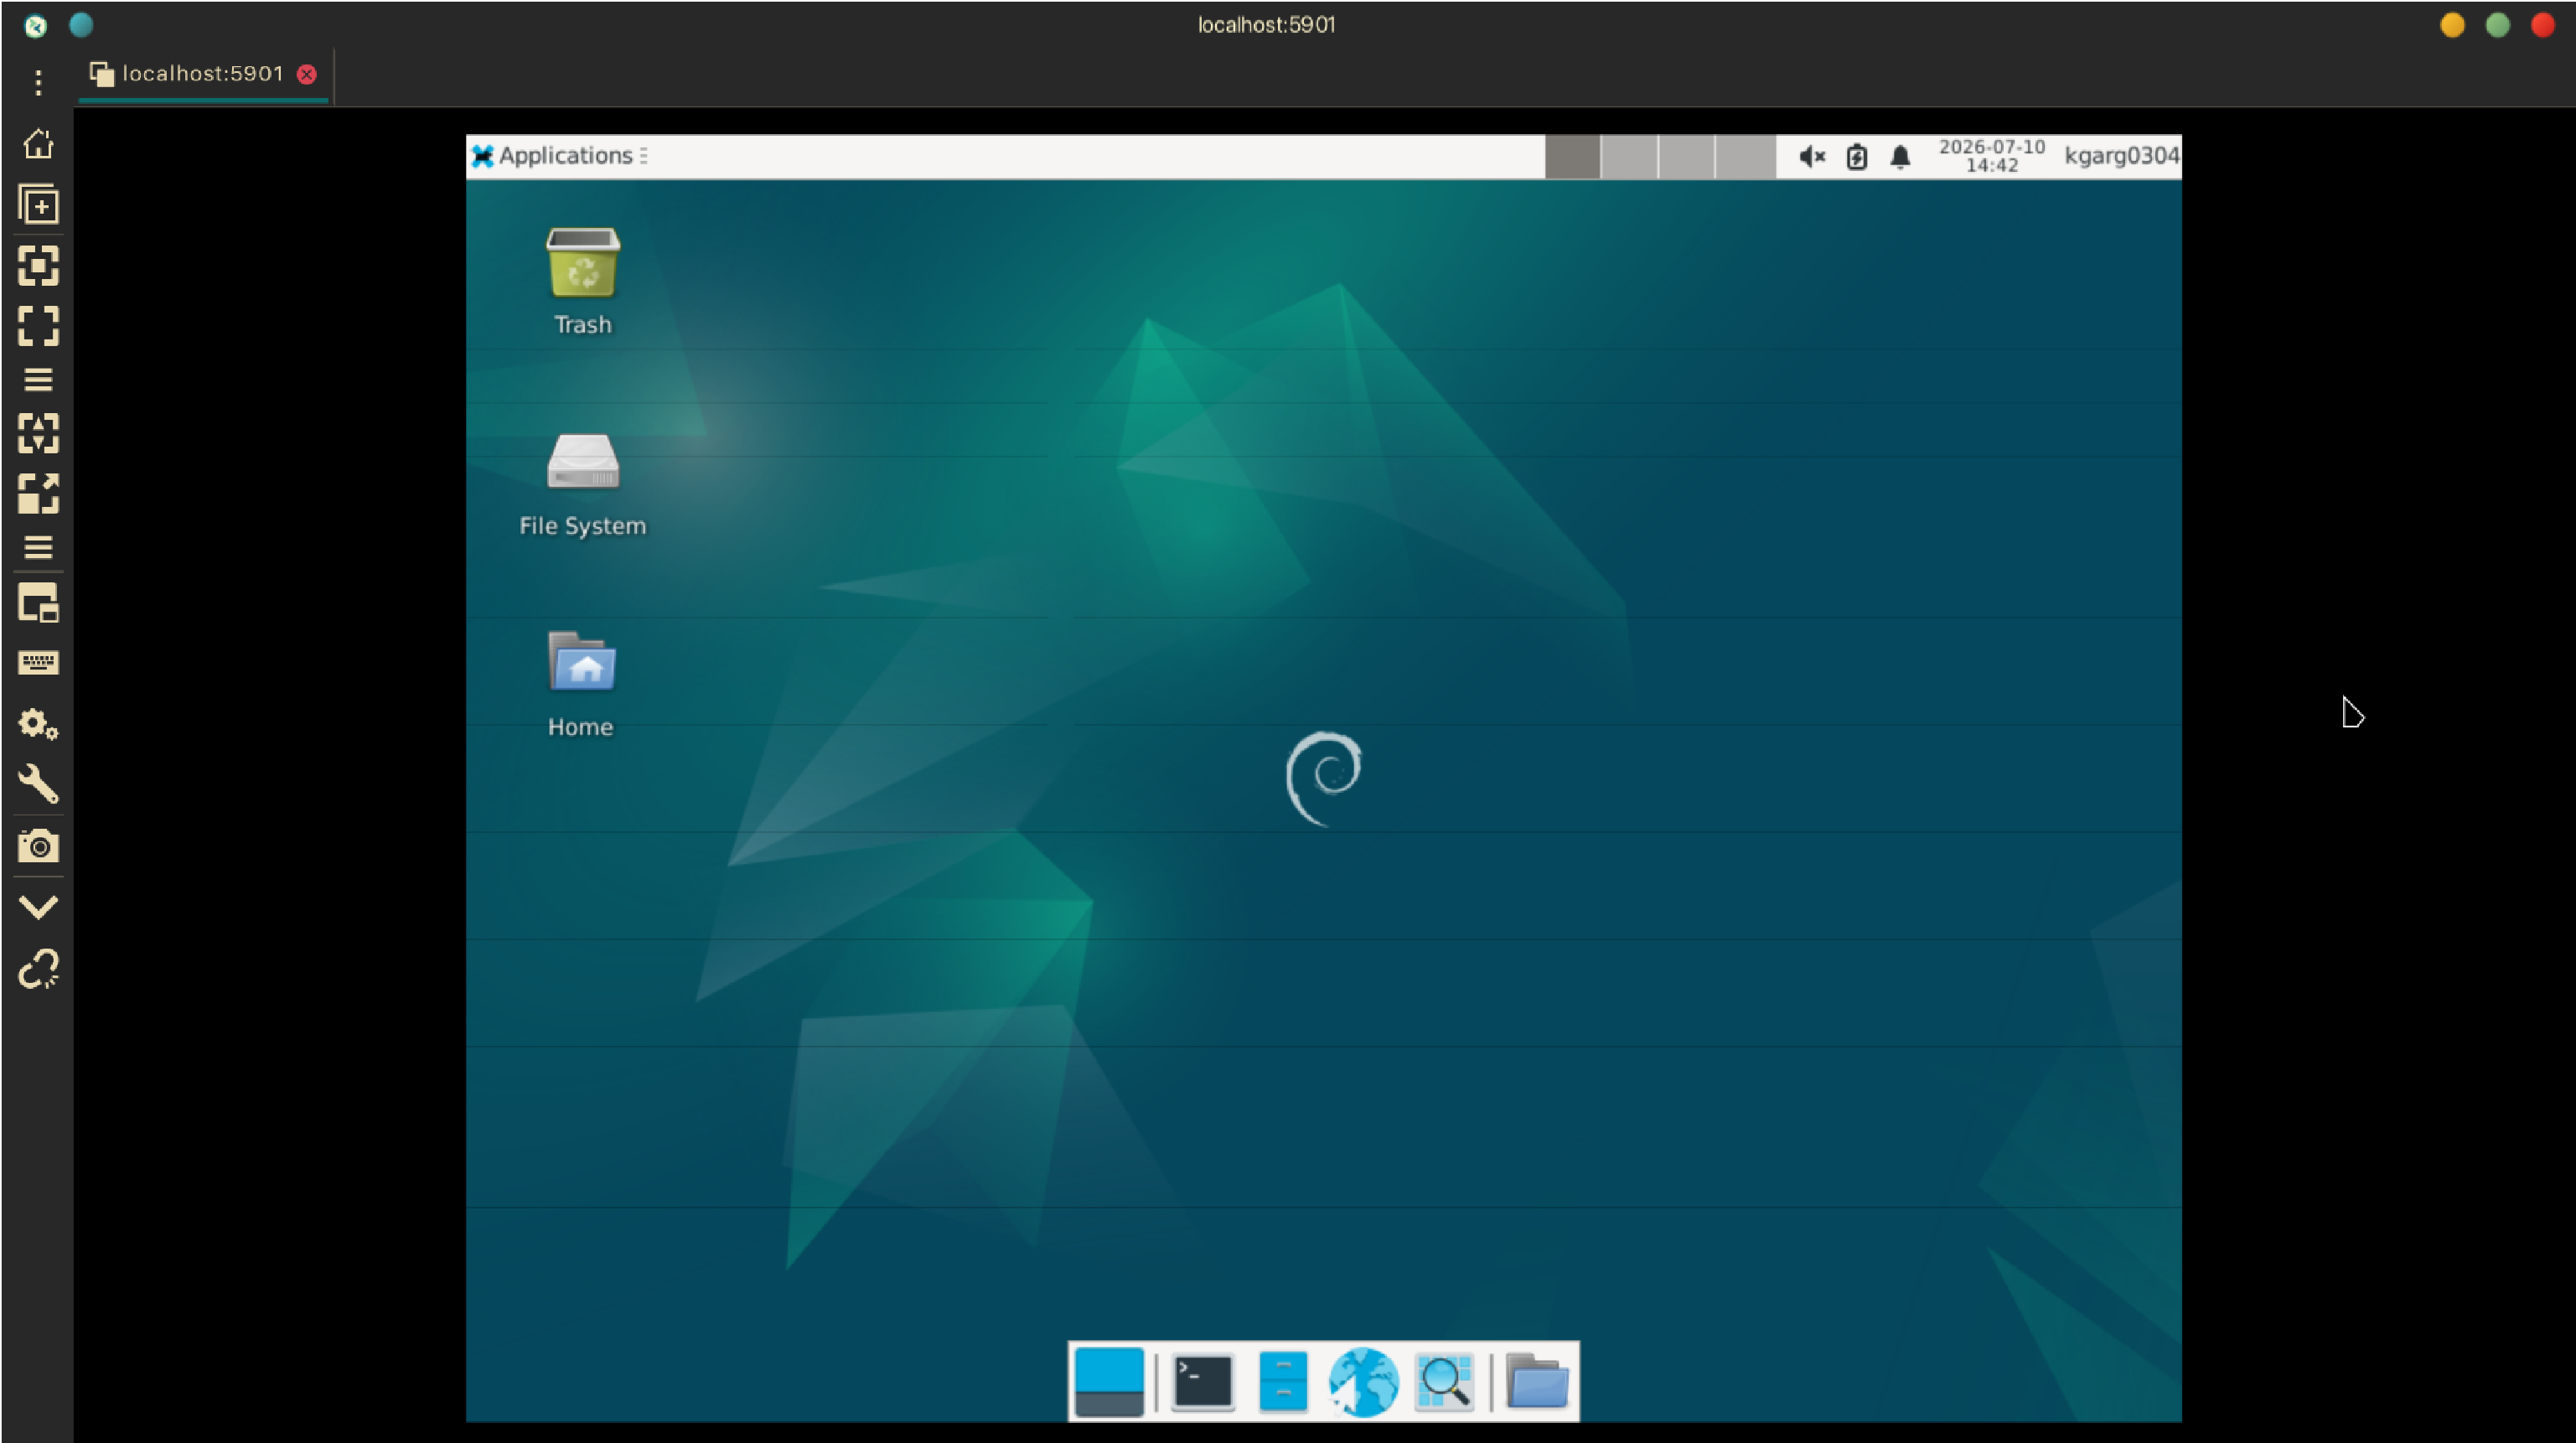
While working on my new project, I hit a interesting roadblock. I needed to run three virtual machines simultaneously, but my local hardware just wasn't powerful enough. I could only run two VMs before the host machine became completely unstable and froze.
I needed a third VM with a proper GUI, so a standard command-line cloud instance wasn't going to cut it. After doing some research, I found a way to securely set up a lightweight desktop environment on a cloud VM. Today, I’ll walk you through how I did it and how you can easily replicate the setup.
For this tutorial, I am using a Debian VM on Google Cloud Platform (GCP).
- Install the Prerequisites First, SSH into your cloud VM and run the following commands to install the XFCE desktop environment and a VNC server:
sudo apt update
sudo apt install xfce4 xfce4-goodies tightvncserver dbus-x11 -y
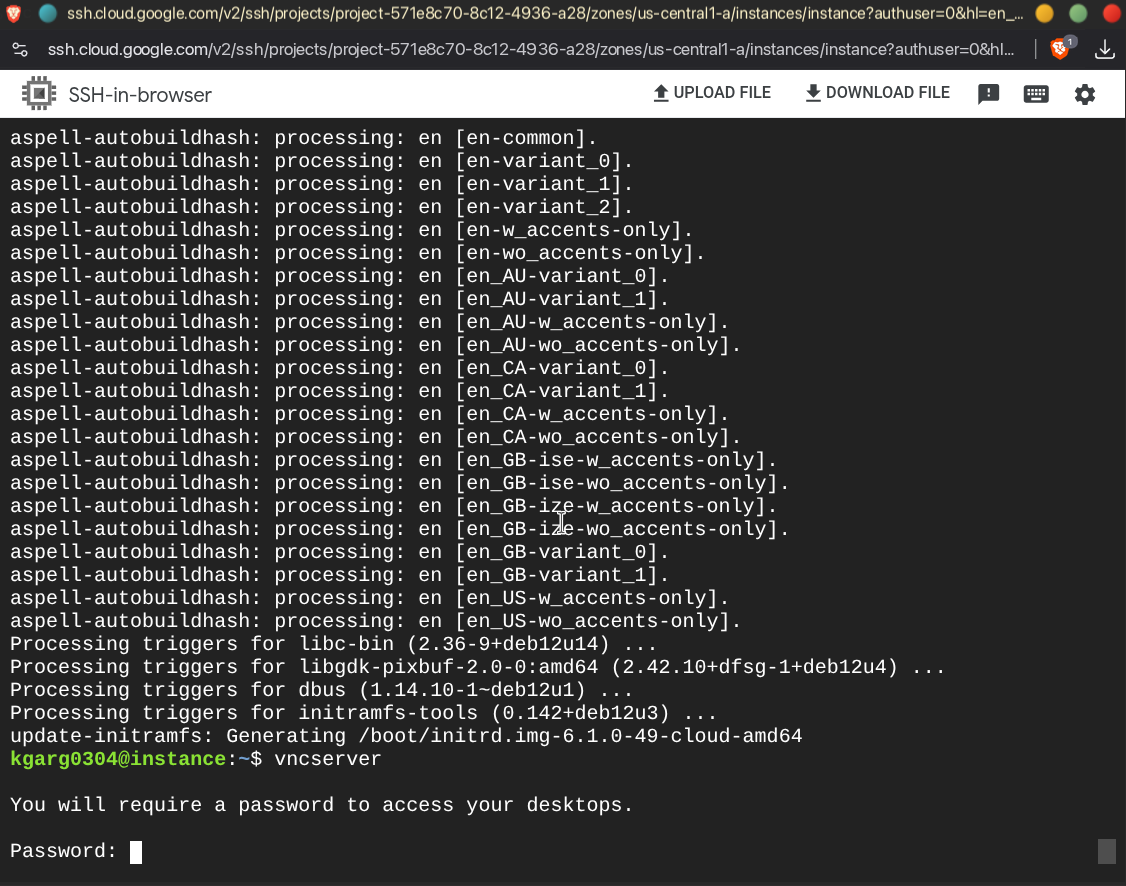
- Set Up the VNC Server Next, you need to set a password for your VNC server by running:
vncserver
You will be prompted to enter and verify a password (max 8 characters).
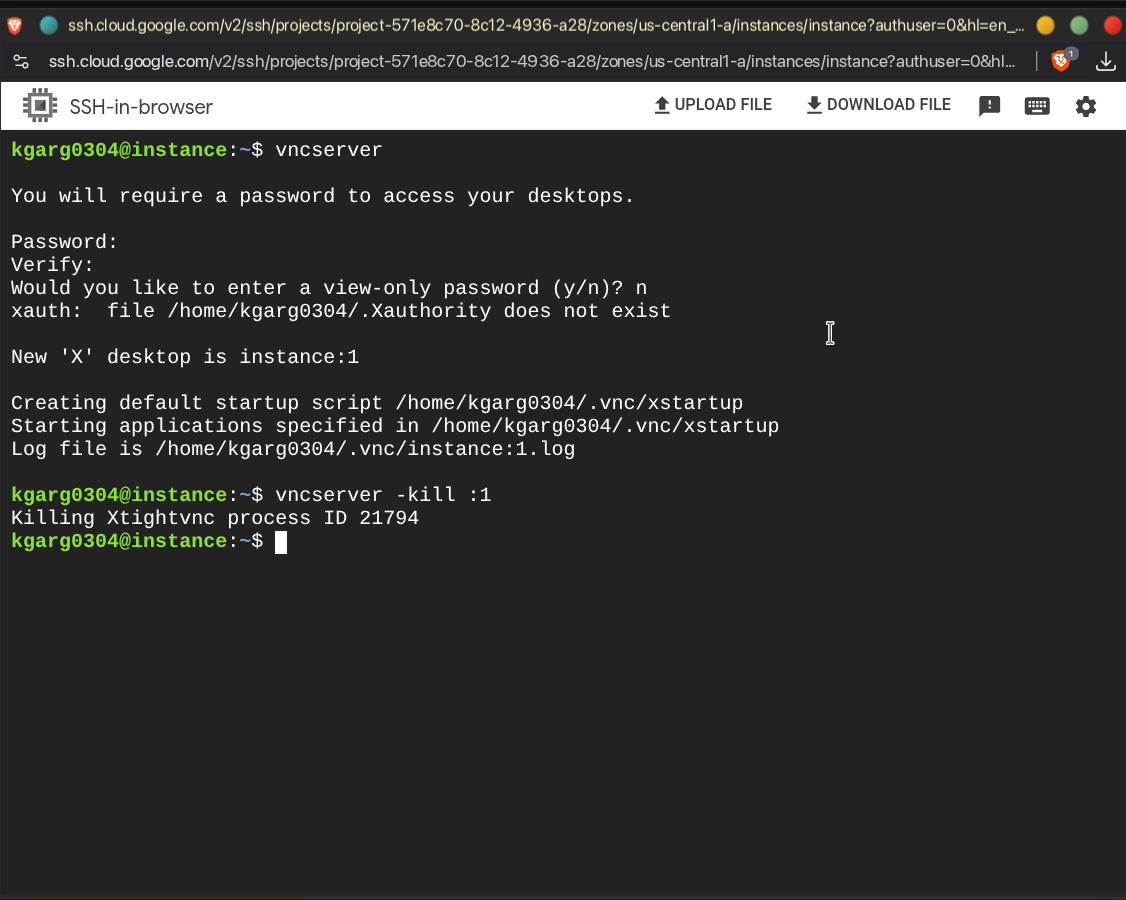
After setting the password, kill the server so we can configure it properly:
vncserver -kill :1
 3. Configure the Xstartup File
Now, open the VNC configuration file:
3. Configure the Xstartup File
Now, open the VNC configuration file:
nano ~/.vnc/xstartup
Delete whatever is currently in the file and replace it with the following configuration to ensure the XFCE desktop loads correctly:
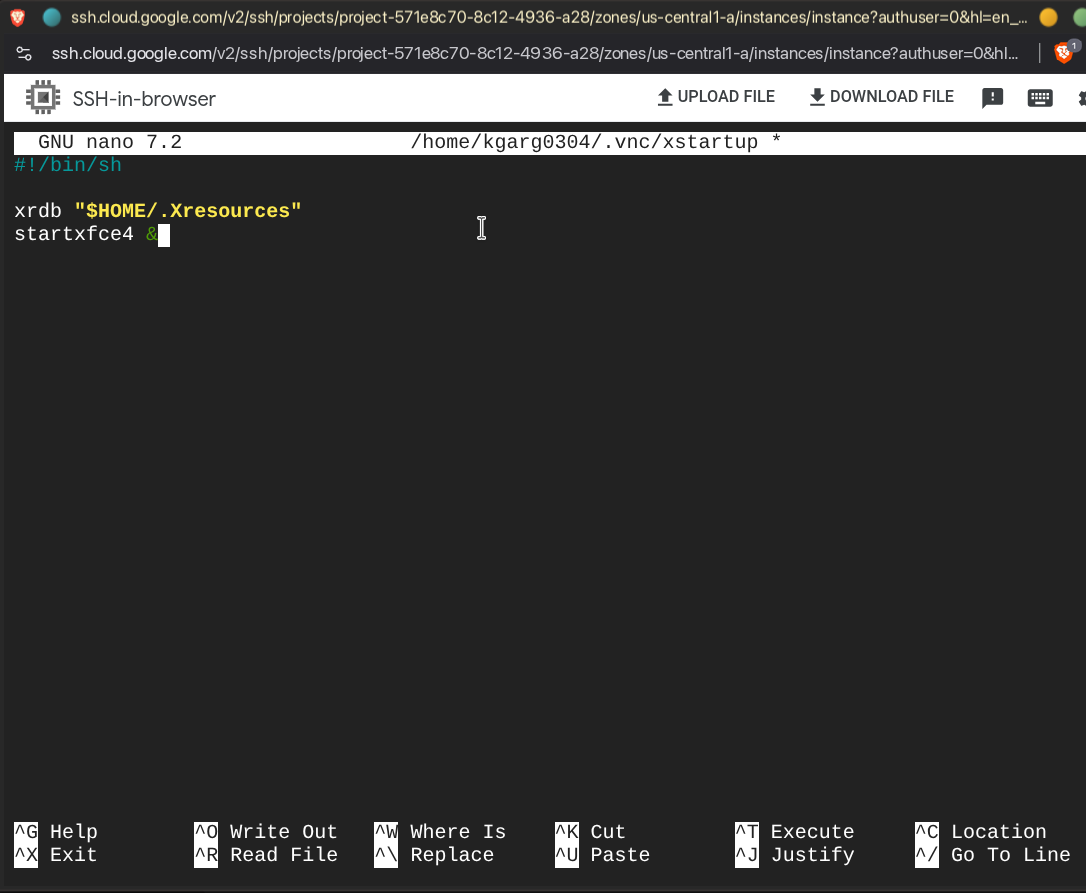
#!/bin/bash
xrdb $HOME/.Xresources
startxfce4 &
(Save and exit by pressing CTRL+X, then Y, then Enter.)
Make the file executable and restart the VNC server. We are adding -localhost yes so the VNC server only accepts connections from the local machine—this is crucial for security!
chmod +x ~/.vnc/xstartup
vncserver -localhost :1
- Prepare Your Local Machine Now that the cloud VM is ready, we need a way to view the remote desktop. I use Remmina, a fantastic, free, and open-source remote desktop client (you can read more about it at remmina.org).
Install Remmina and its VNC plugin on your local host (assuming you are on a Debian/Ubuntu-based system):
sudo apt update
sudo apt install remmina remmina-plugin-vnc -y
- Create an SSH Tunnel and Connect Because we bound the VNC server to localhost for security, we need to create an SSH tunnel to securely forward traffic from our local machine to the cloud VM.
I am using gcloud for this, but you can use standard SSH depending on your cloud provider:
gcloud compute ssh YOUR_VM_NAME --zone=YOUR_ZONE --ssh-flag="-L 5901:localhost:5901"
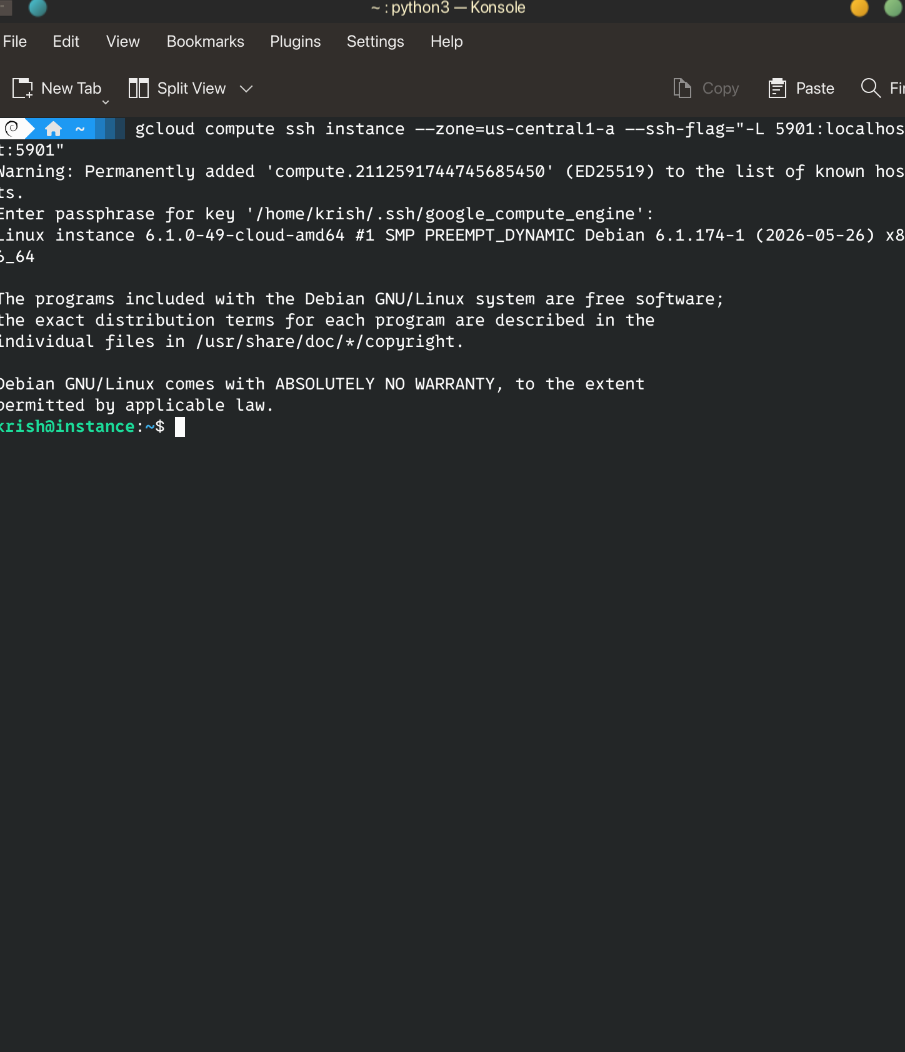 This command forwards your local port 5901 to the VM's port 5901.
Finally, open Remmina on your local machine. Create a new VNC connection and point it to: localhost:5901
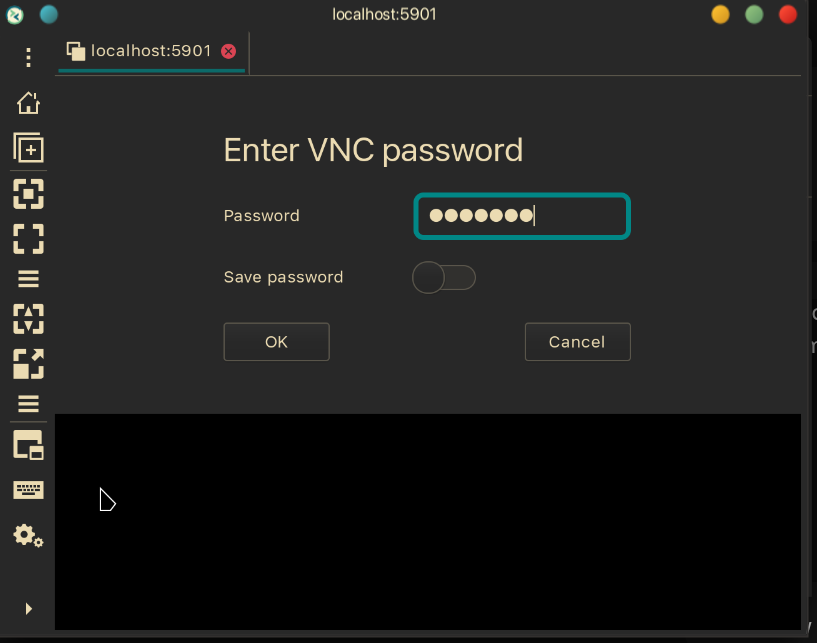 Enter the VNC password you created in Step 2, and you will be greeted by your cloud VM's GUI!
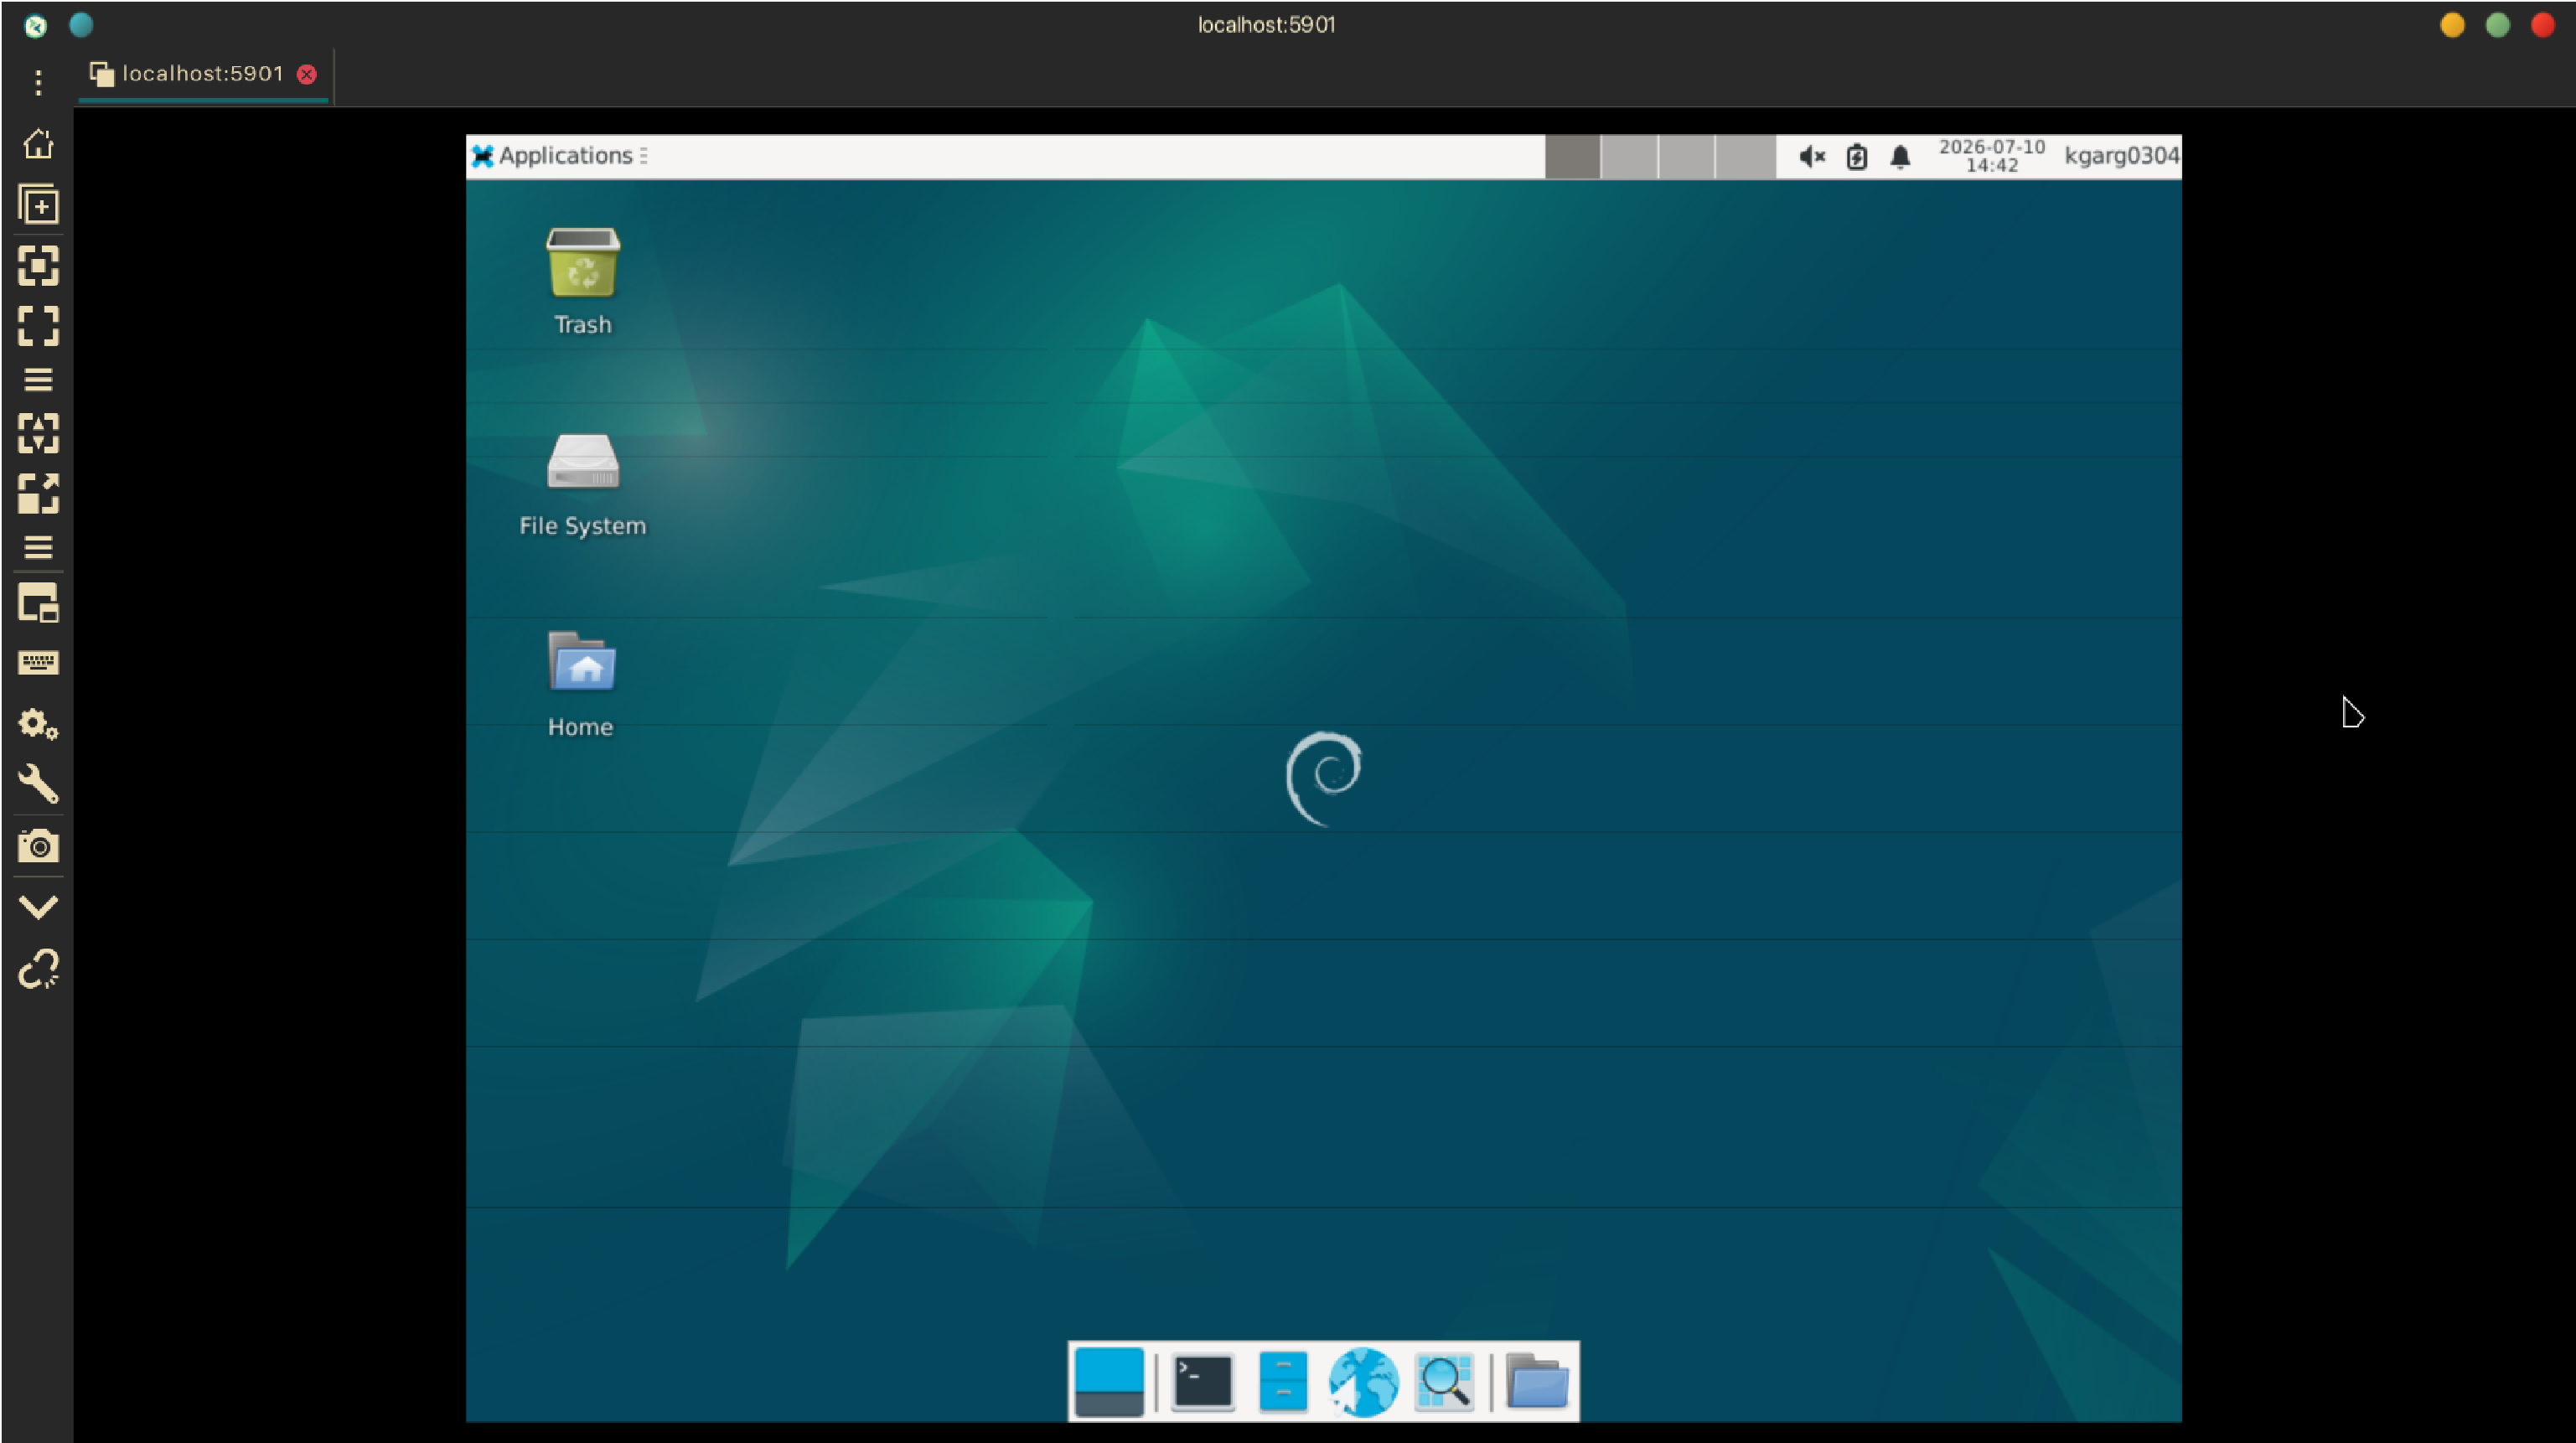 You can now use it just like a local computer, without melting your host machine's CPU. Enjoy!